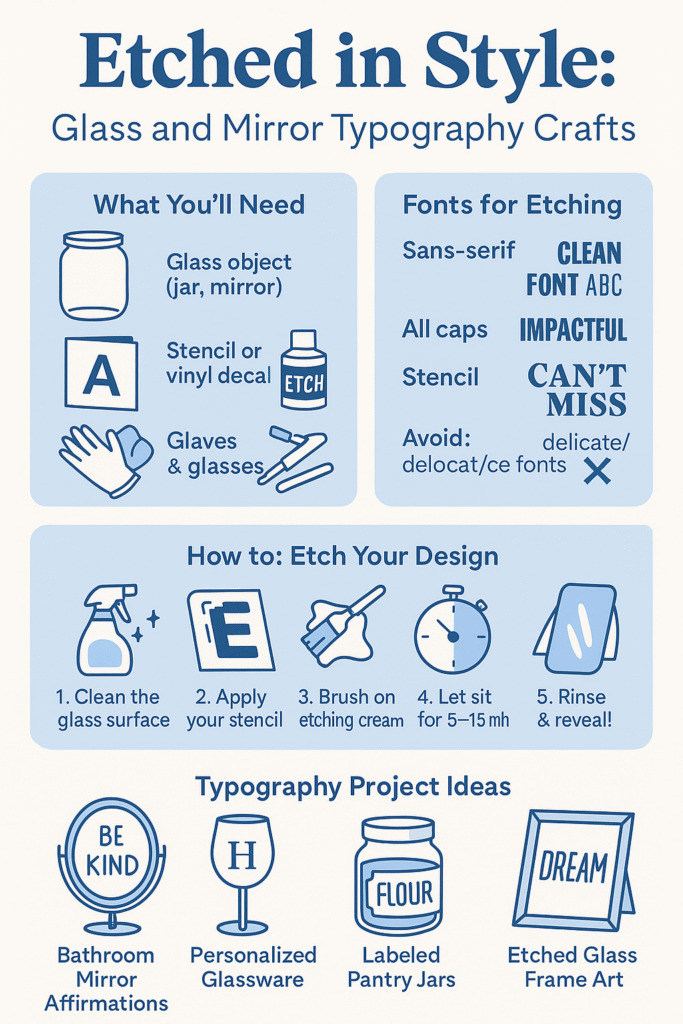
Okay, typography trailblazer—today we’re turning up the glam and dialing in precision. Welcome to glass and mirror etching, the sleek, sophisticated cousin in the DIY family. Whether it’s a monogram on a wine glass, an inspiring quote on a vanity mirror, or labeled pantry jars with a chic frosted look, etched typography is where elegance meets personalization.
And you don’t need a workshop full of lasers. Just a stencil, some cream, and a bit of boldness.
🧊 What Is Glass Etching?
Glass etching is the process of creating a frosted design on the surface of glass or mirror. It’s done using:
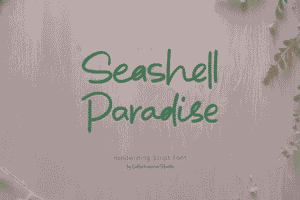
Try out and download our best font for free 👀


-
Etching cream (a chemical that lightly corrodes glass)
-
Or for the pros: sandblasting (we’ll save that for Level: Wizard)
Today’s method? Etching cream—safe for home crafters, totally typography-friendly.
🛠️ What You’ll Need:
-
Glass surface (jar, mirror, glass frame, tumbler, etc.)
-
Stencil or vinyl decal of your chosen typography
-
Etching cream (found in most craft stores)
-
Painter’s tape
-
Gloves and safety glasses
-
Craft stick or small brush
-
Running water (for rinsing)
🔠 Typography for Etching
Font choice is everything here, because unlike paint or pen, you can’t layer or correct. So choose wisely:
Side Note : Promote & earn with Letterhanna’s affiliate program.
-
Sans-serif fonts (like Futura or Montserrat) give clean, modern looks.
-
All caps works great for impact and readability.
-
Stencil fonts avoid delicate pieces falling out of vinyl stencils.
-
Avoid: ultra-thin or heavily detailed fonts—they can bleed or get lost.
✂️ How-To: Etch Your Message Like a Pro
-
Clean the Surface
A smudge-free glass is essential. Wash, dry, and wipe with rubbing alcohol. -
Apply Your Stencil
Use painter’s tape to hold the stencil or vinyl decal in place. Press firmly to prevent etching cream from sneaking underneath. -
Glove Up and Apply Cream
Using a brush or craft stick, dab a generous layer of etching cream over the open stencil areas. Avoid getting it outside the design. -
Wait It Out
Let it sit (typically 5–15 minutes—check your product’s label). -
Rinse and Reveal
Rinse under running water while wearing gloves. Remove the stencil and dry off. Voilà! Your text is now etched into the glass forever.
💡 Typographic Project Ideas
-
Bathroom Mirror Affirmations
Add subtle frosted words like “You Got This” or “Kindness First” to your mirror. -
Personalized Glassware
Monograms, names, or titles (“Dad Fuel”, “CEO Juice”) on mugs and glasses. -
Labeled Pantry Jars
Say goodbye to sticky labels and hello to etched elegance: “Flour”, “Sugar”, “Snacks.” -
Etched Glass Frame Art
Use bold lettering to etch quotes onto glass sheets, then frame them for a floating text effect.
🧠 Unique Fact of the Day:
Did you know the first glass etching dates back to the 1500s? Back then, artisans used acids to create elaborate patterns—today, we’re using it to spell out “Snack Queen” on a cookie jar. Evolution, baby.
🔤 Font Tip of the Day:
Use a bold, stencil-style font when making your own vinyl stencil with a cutting machine. It ensures that all letters are connected and you won’t lose the center of your “O” mid-etch.
🧙 Crafting Wisdom:
-
Test on scrap glass first—like an old picture frame.
-
Use mirror backs for dramatic reversed etching effects.
-
For added flair, combine etched areas with hand-painted accents around the glass.
✍️ Today’s Creative Challenge:
Etch a short motivational word onto a mirror or frame and hang it where you’ll see it daily. Or, personalize a glass and gift it to someone who deserves a little stylish shoutout.
Here Are Some Fonts You Might Love! 👀